Little Details Make a Big Impact How to Showcase Your Work's Features
All Photos Courtesy of Steve Meltzer
It is in the details of an artwork or crafts piece that one’s skills are really on display.
Close-ups highlight the intricacies of the artist’s skill and talent. And details play an important role in making a sale.
We have all seen this work at a craft fair or art show. You see something catch someone’s eye, and the first thing they do is ask if they can hold the object to get a closer look. Holding and turning the object in their hands, you see them look deeply to focus on the details before they decide if they want to purchase the piece.
However, based on photos published on websites, most craftspeople only see the “big picture” and overlook taking photos of the details of their work. Detail shots are important because they add interest to a website, and it makes good sense to take detailed pictures whenever work is photographed.
Taking Detail Shots
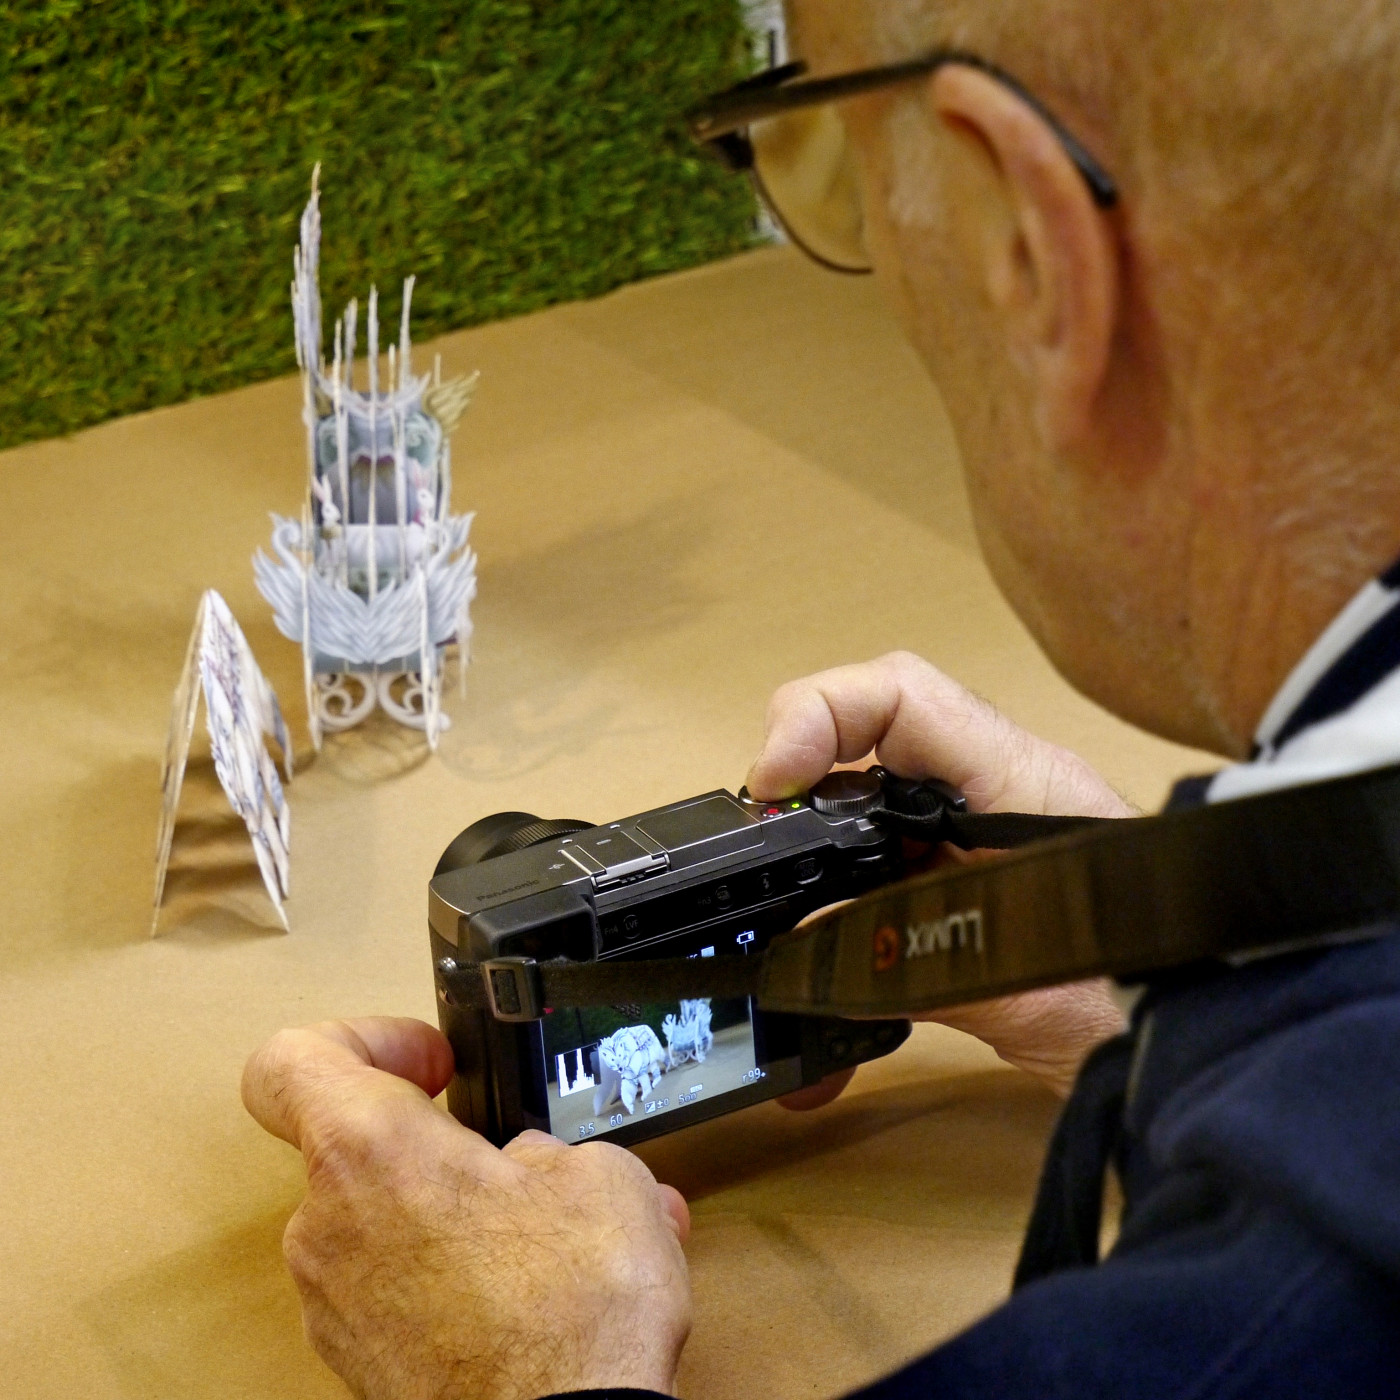
Thanks to iPhones and the new, advanced, compact digital cameras, it is easier than ever to take decent close-up photos. Most devices can focus close to subjects — within a few inches — and have 12MP or larger sensors that give you files with plenty of extra pixels to work with.
To make the most of your smartphone or digital camera, follow these tips for shooting details:
- These cameras/iPhones focus closest when the zoom lens is set to its widest angle. This means you tend to move your device closer to the subject. But be careful. When focusing close-up, give yourself some extra room and do not use the closest focus; instead, shoot from the lens at almost the closest. Then hold the camera a few inches away from the subject. This extra space makes it easier for the focusing system to find the correct focus point.
- For close-ups, you need a lot of light. Therefore, when setting up your work, pay special attention to getting lots of light on the detail.
- When shooting close-up shots, turn off the camera or iPhone flash.
- Frame the photo on the monitor with the detail in the center of the frame.
- Take several shots and then reframe, relight, and take several more frames.
- Hold the device as steady as possible.
Blur caused by camera shake is the biggest problem when taking detail photos. Most cameras and smartphones have image stabilization (IS) systems that do a good job of keeping images sharp, but as the camera gets closer to the subject, the effect of camera motion becomes more prominent.
A Trick for Better Close-up/Detail Shots
Normally when shooting close-ups and details, it is a good idea to use a tripod. But if you do not have a tripod, there is a trick to get sharper pictures without one.
For lack of a better name, I am calling this the “fist-o-pod” method. You use your hand to create support for the camera. It works surprisingly well with the tabletop photography of small objects.
Begin by setting up your craftwork and turning on the light source. Holding the camera/smartphone near the work, frame and focus the image. Then place your left hand at the camera position. Press your fist against the tabletop and hold the camera phone firmly in your right hand while bracing it against the top of your fist.
Make sure to grip the device in a way that does not block the lens and lets you push the shutter release. I had my friend Eric model a fist-o-pod to demonstrate how to do it. He owns a gift shop, and each week, he photographs new items for his website. This technique works with small cameras, as well as iPhones.
Using one’s fist is also better than having the camera sit flat on the tabletop, because the fist provides a better shooting angle. During the shoot, Eric demonstrated that for taller objects, you can stack a few books on the table and put your fist on top of them to get the right angle.
If your camera has an articulated LCD monitor, you can flip the screen up, which will enable you to see the image more comfortably.
Details: What To Select
The purpose of the detail shot is to highlight a feature of your work that best shows off your skill and creativity. When choosing a detail or details to photograph, you need to put yourself in your customer’s shoes. What do you think will catch their eye? Look for strong colors, strong forms, and visual interest.
Once you decide on the detail you want to emphasize, you have two choices about how to deal with it. The first is to start with a photograph of the entire piece and then crop down to just that detail using a photo editor.
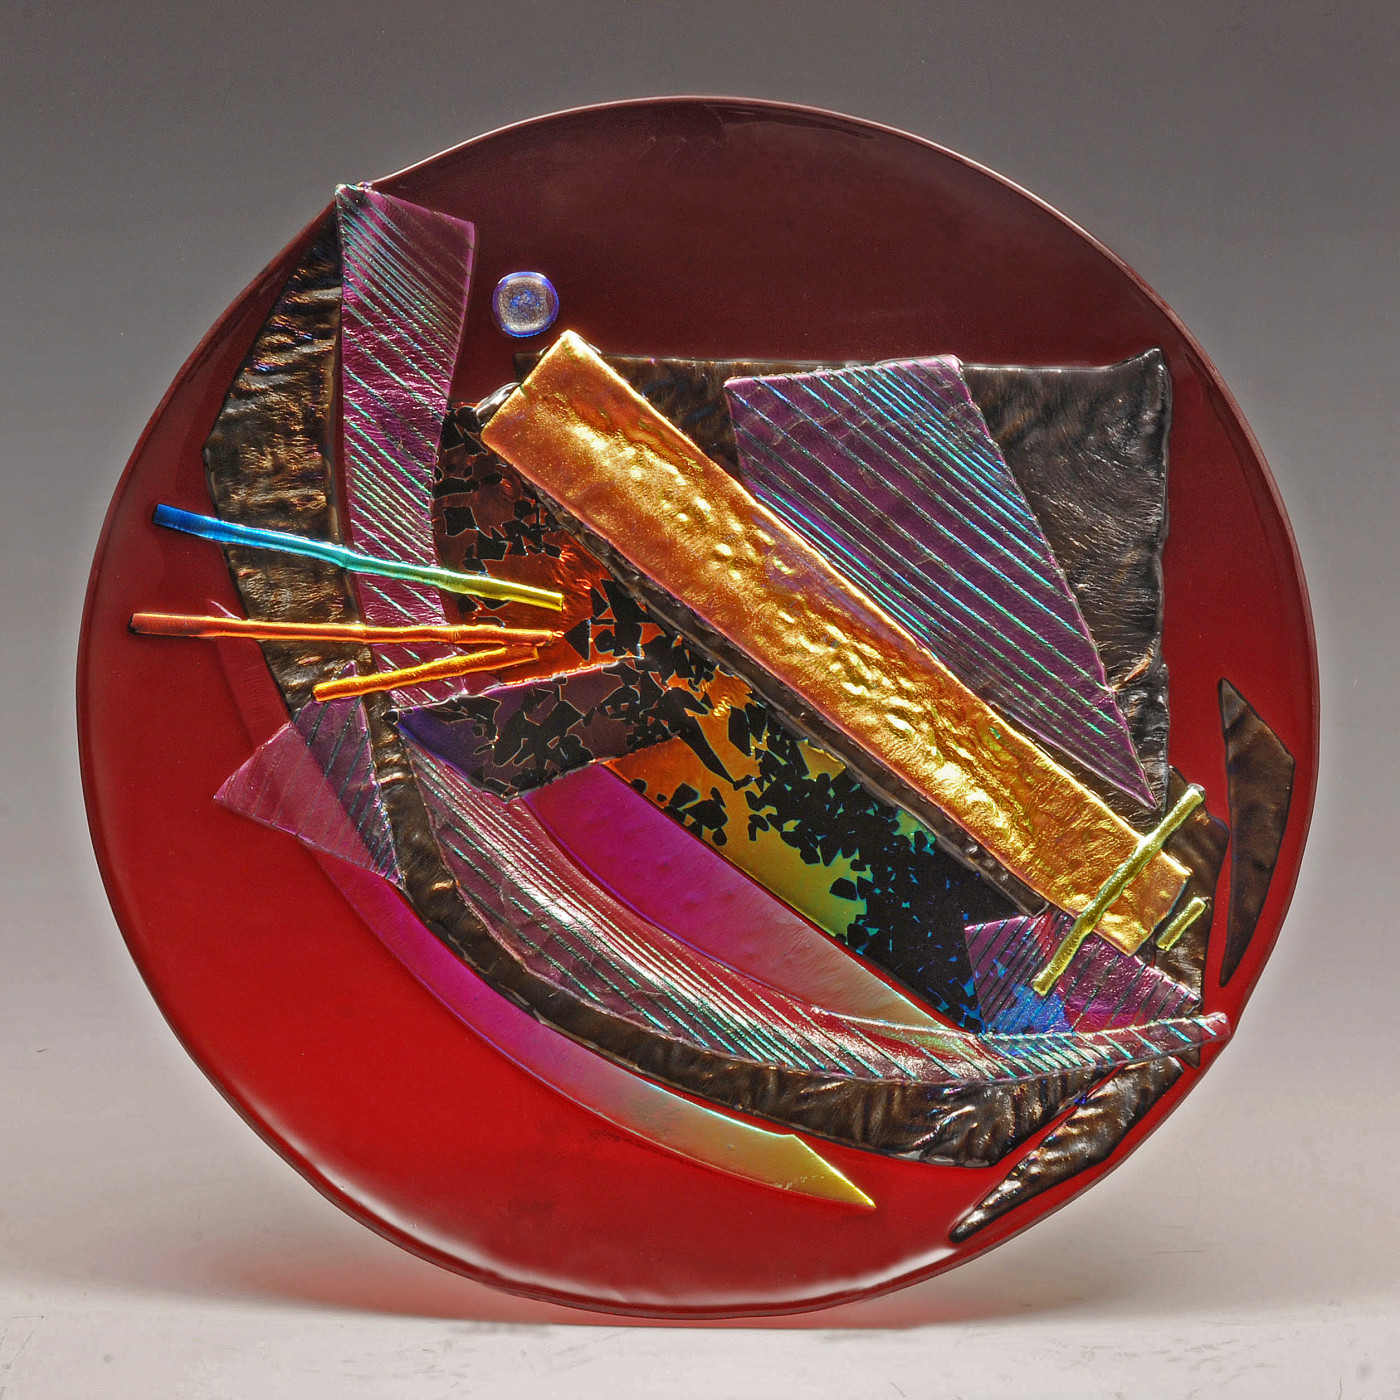
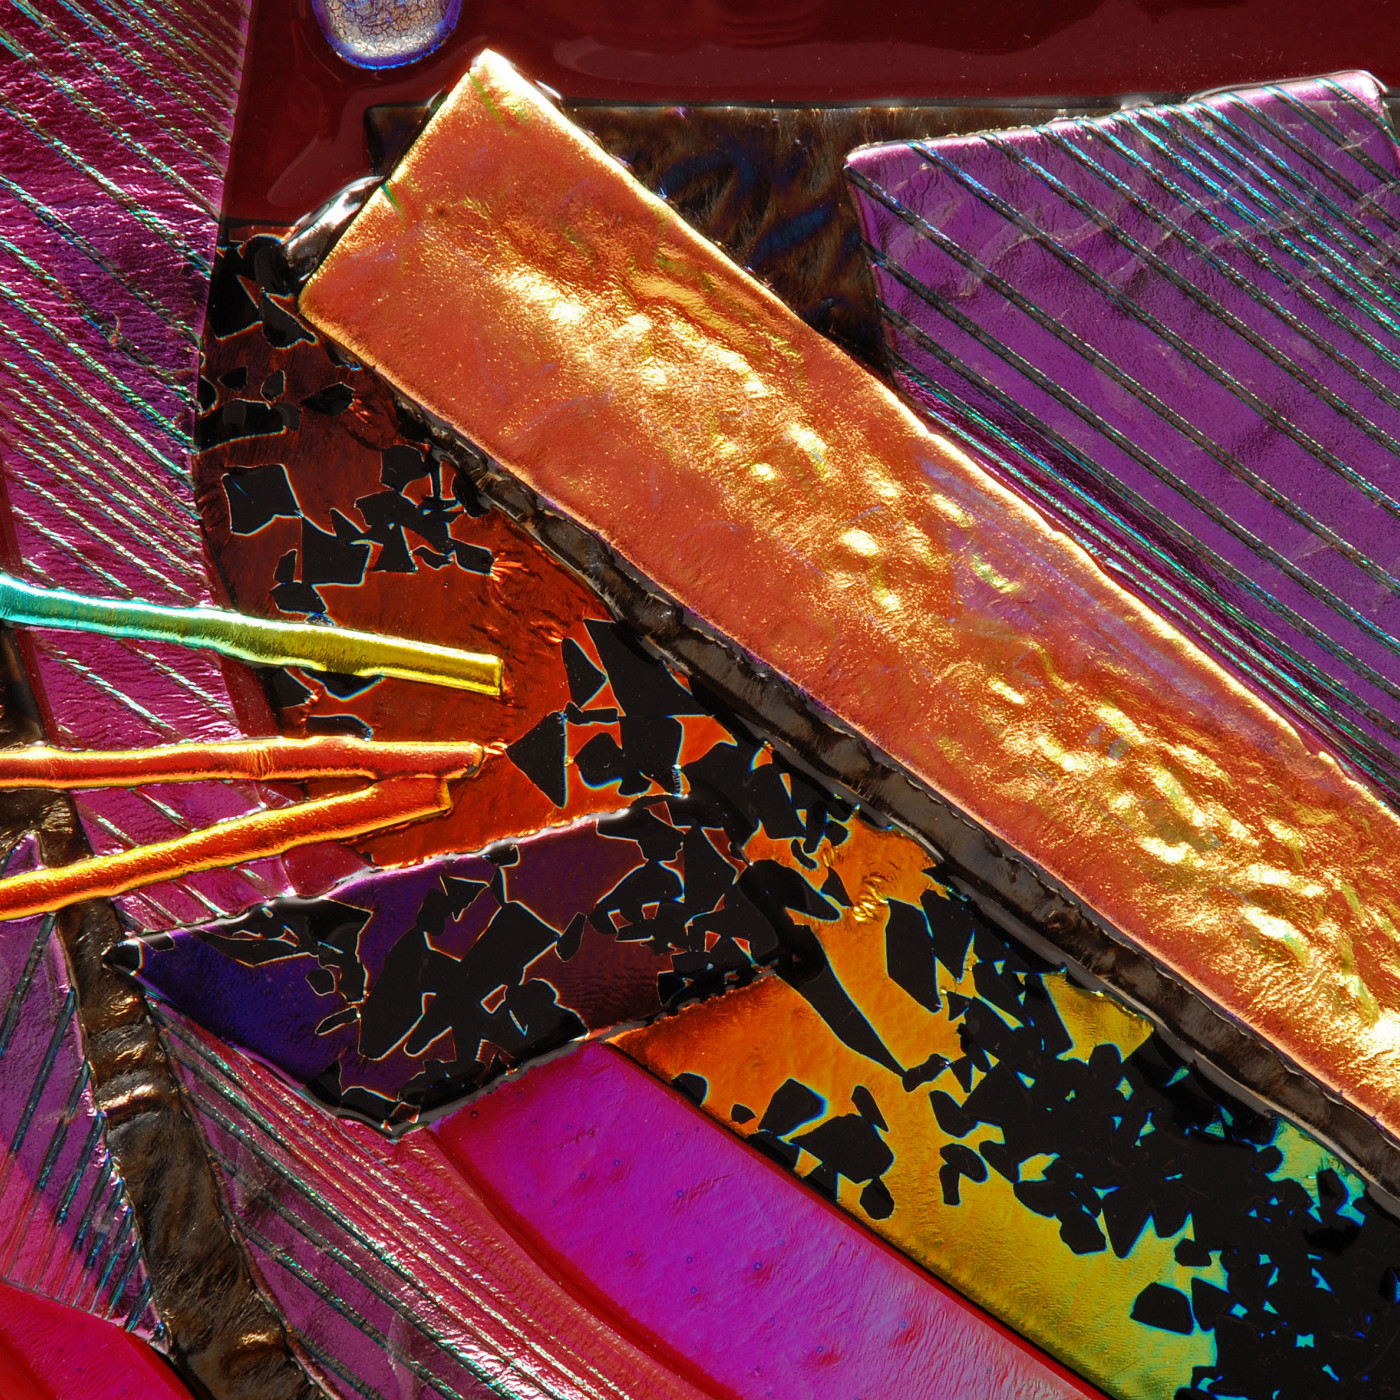
The two photos of a ceramic plate illustrate this. Having shot a photo of the whole plate, I used my cropping tool to cut out a small section of the original photo. Then I enlarged this detail crop using the resizing tool in my editing software to create an image file for the website (about 1080 x 720 pixels).
For many website applications, the idea of cutting a detail out of a larger image — that is, making a digital crop — produces a sufficiently sharp image. But there are times when cropping does not work well, especially when photographing a work with very fine details.
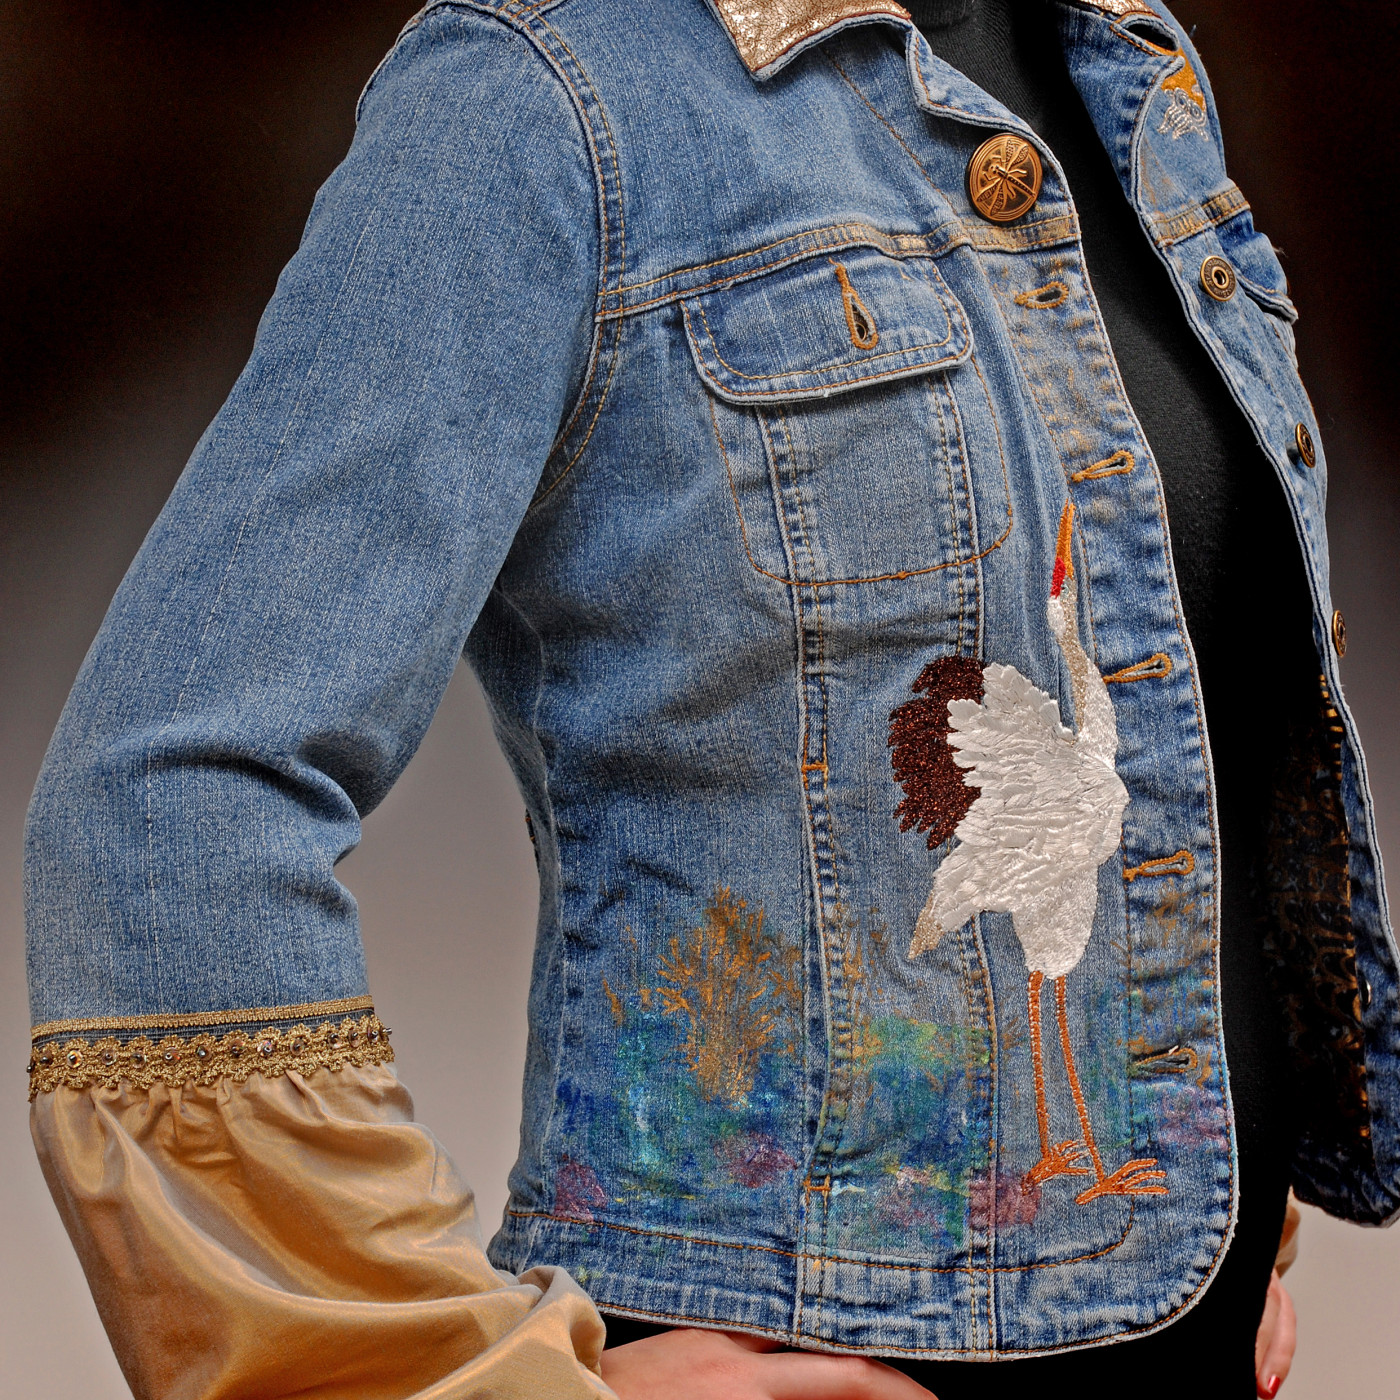
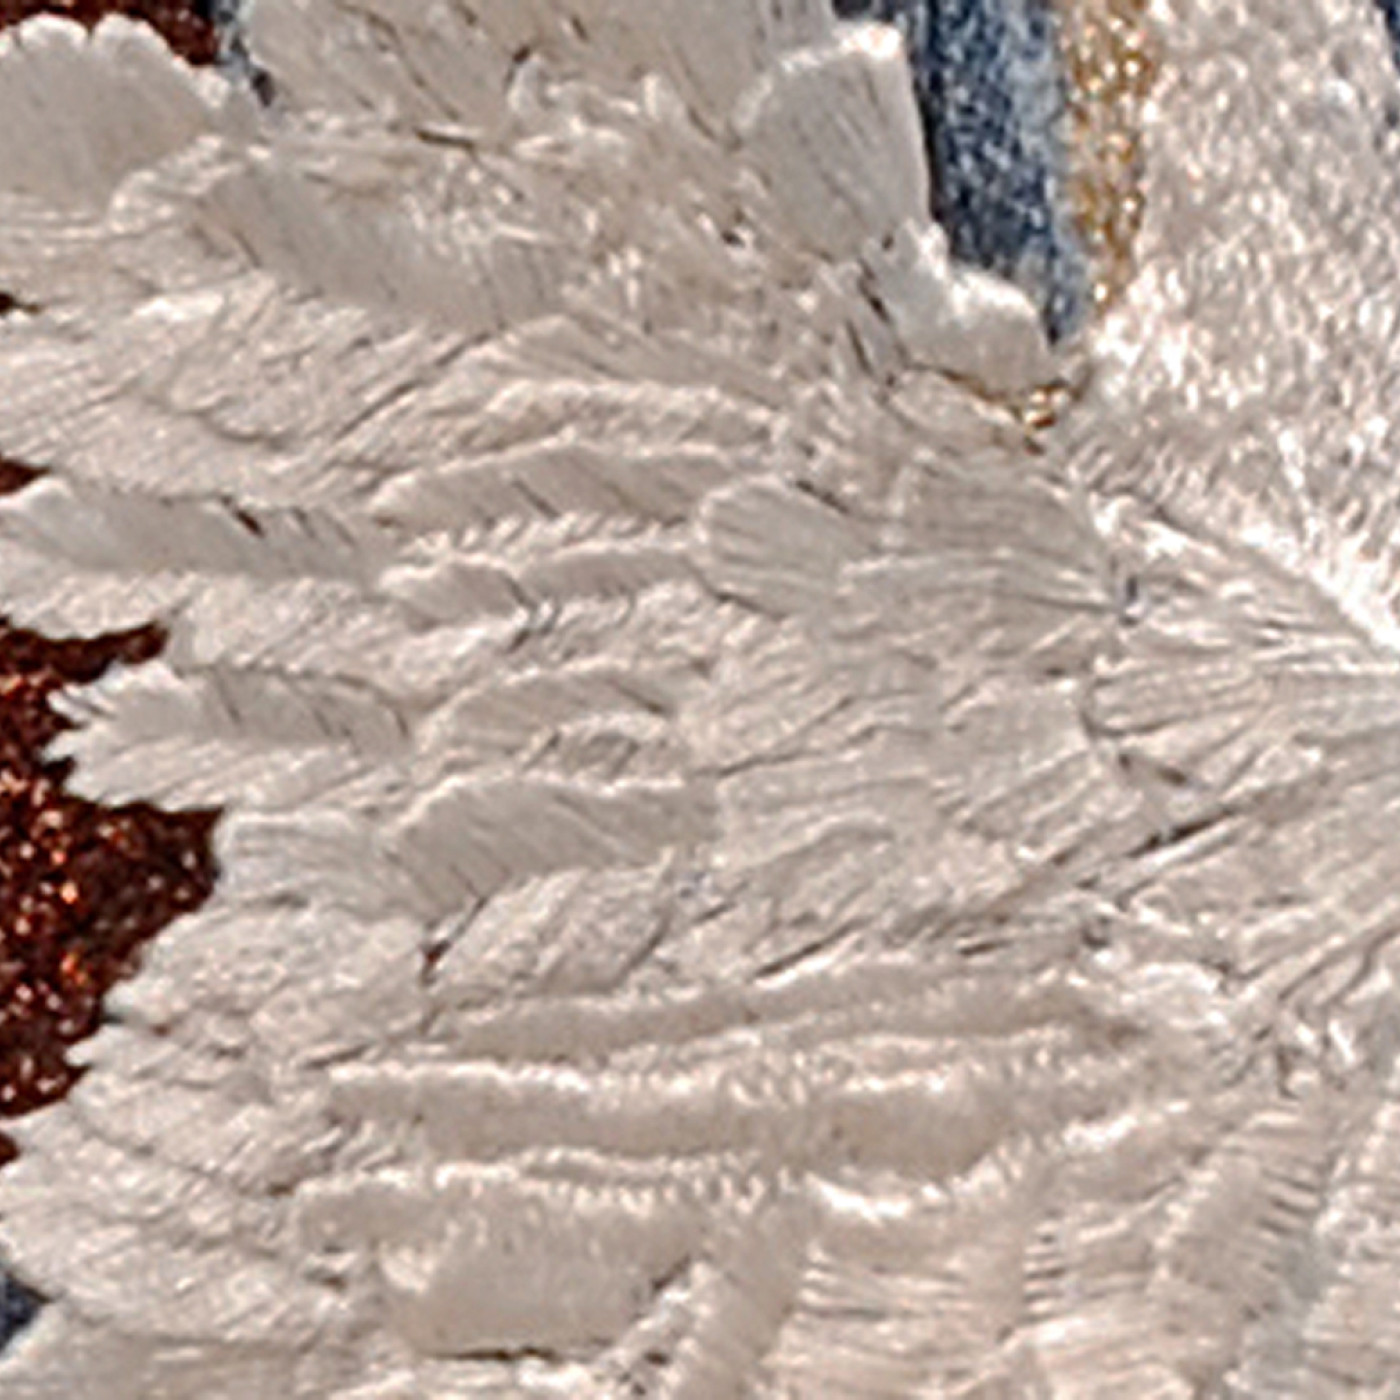
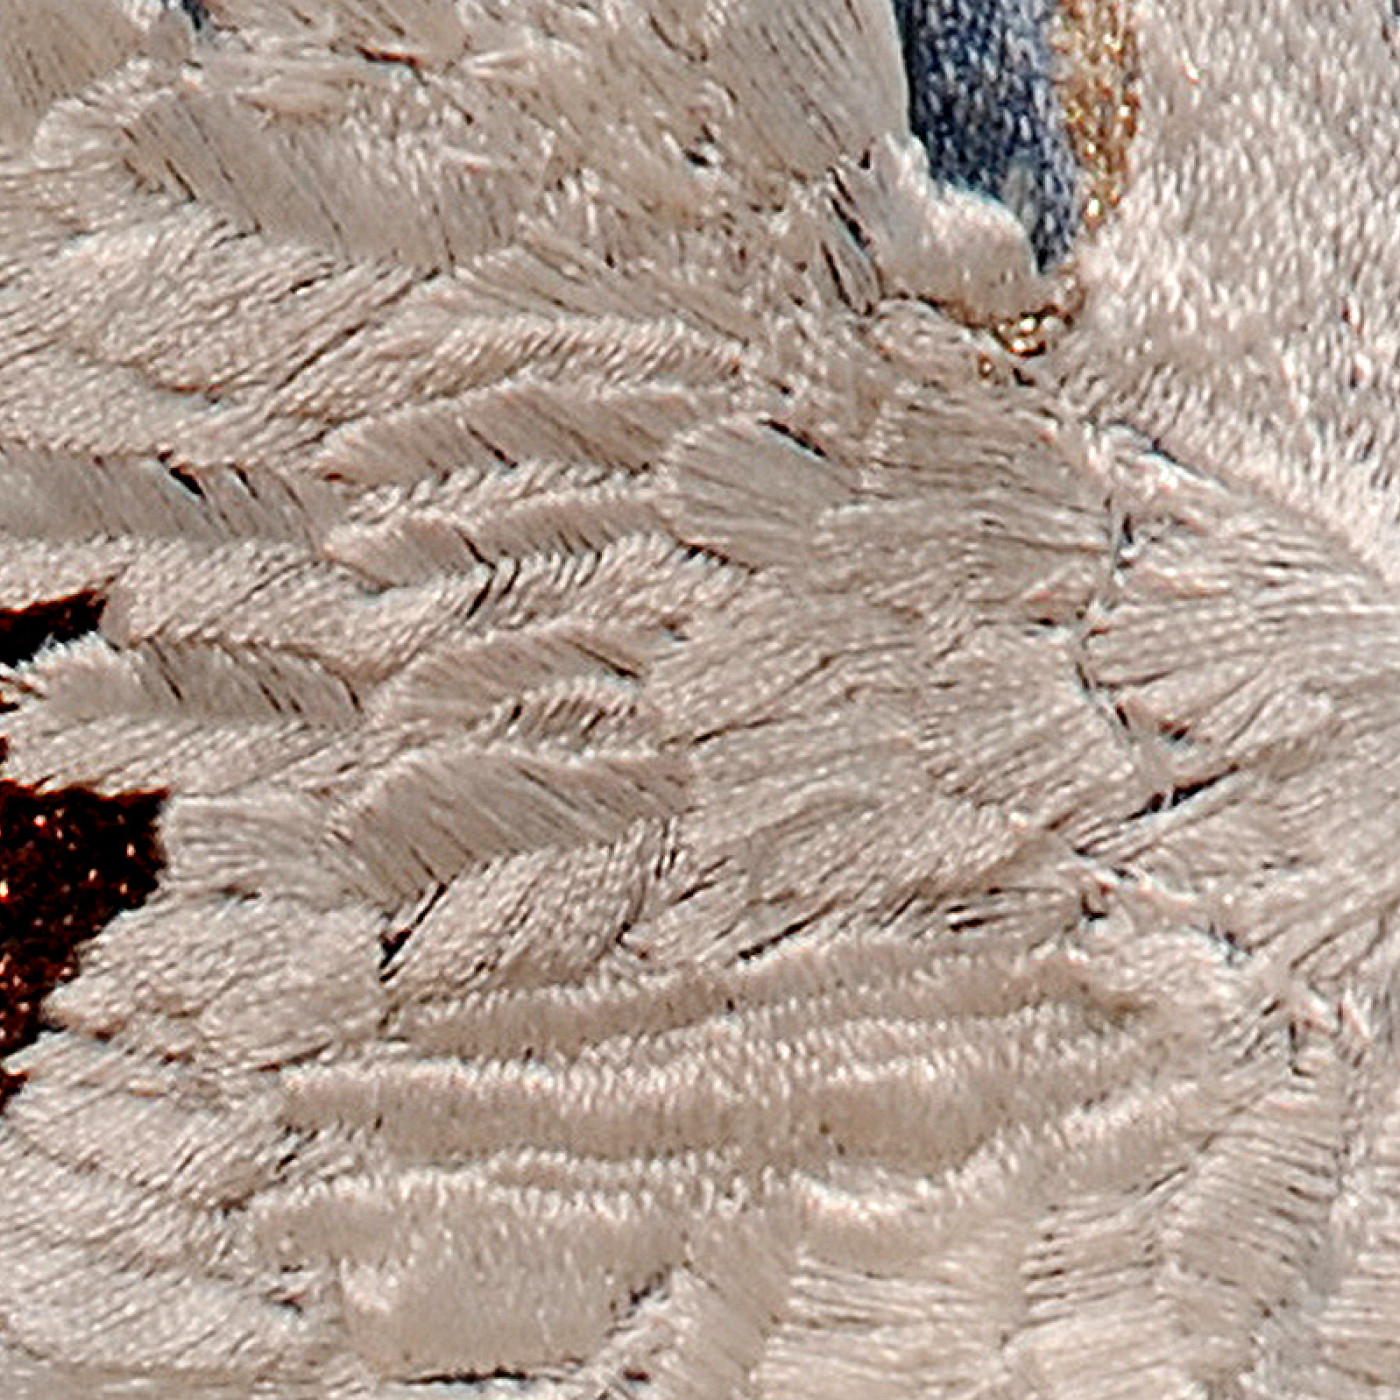
To illustrate what I mean, I photographed a model wearing a handmade vest. I first tried the crop and enlarge strategy but discovered I lost a lot of the image clarity in the enlargement.
So, using the second method, I reshot the model and vest, this time photographing a close-up of the feather embroidery. In this detail shot, you can see the texture of the fabric and intricacy of the needlework.
Detail shots can make excellent graphic images, too. They can stand alone and attract new customers.
For example, here is the detail of the plate reproportioned and cropped to fit a Facebook banner, with proportions of 820 x 312 pixels. It makes a great visual that grabs your attention and welcomes people to your page.
Detail shots can open a whole new way of seeing your work and strongly presenting it to the public and advancing your sales.
