Make Craft Photos Shine Tips to Give Them Some Extra Sparkle
Thanks to modern technology, even the simplest digital camera or smartphone can produce decent sharp and colorful photos. They are great for a family webpage or in a scrapbook.
But as pleasant and presentable as they are, I think they do not have the qualities of photos that sell artwork. As a crafts fair director once said, “A good photo catches a viewer’s (juror’s) attention and can get you into shows. But mediocre photos can keep even great crafts out of shows.”
Digital devices do a good job of recording the world, but they lack the intelligence to understand what they are seeing. This limits their ability to get the most out of images.
The richness of an image is found outside the camera, and the prime component of that is image contrast. This term describes the range of tones between the light and dark areas in a picture.
At one end of the range are high-contrast images where there is a big difference between light and dark areas in the scene. Think of photos of a beach at sunset. The sun is many times brighter than the beach, and the contrast is too great for either film or sensors to record properly.
In most photos, either the sun washes out or the beach is too dark. On the other hand, low-contrast images are like photos taken in a fog. Everything is gray, and the image lacks deep dark colors or bright light ones.
To get the most out of images, the photographer’s task is to match as closely as possible the contrast range of the film or sensor to the contrast range of the artwork or the scene.
Bouncing the Light
There are many ways to control contrast, and many companies make and sell devices to help photographers do this. While I have accumulated dozens of professional devices through the years, I always try to find ordinary, easily obtained materials with which to make my own light modifiers.
I am sharing a couple examples of simple, inexpensive devices I have made to enhance the contrast range in photos. Getting detail in shadow areas is important because shadows define the shape of objects.
When you use a camera’s built-in, pop-up flash, there is a tendency to get dark shadows that lack detail in the photo. You can improve these photos by using a “bounce” device to add a little light to the dark areas.
The simplest bounce device is a plain old white piece of poster board. To add light to a shadow area, hold the card near the dark area of the subject (outside the image frame, of course). Angle the card so it bounces extra light onto the subject’s dark side.
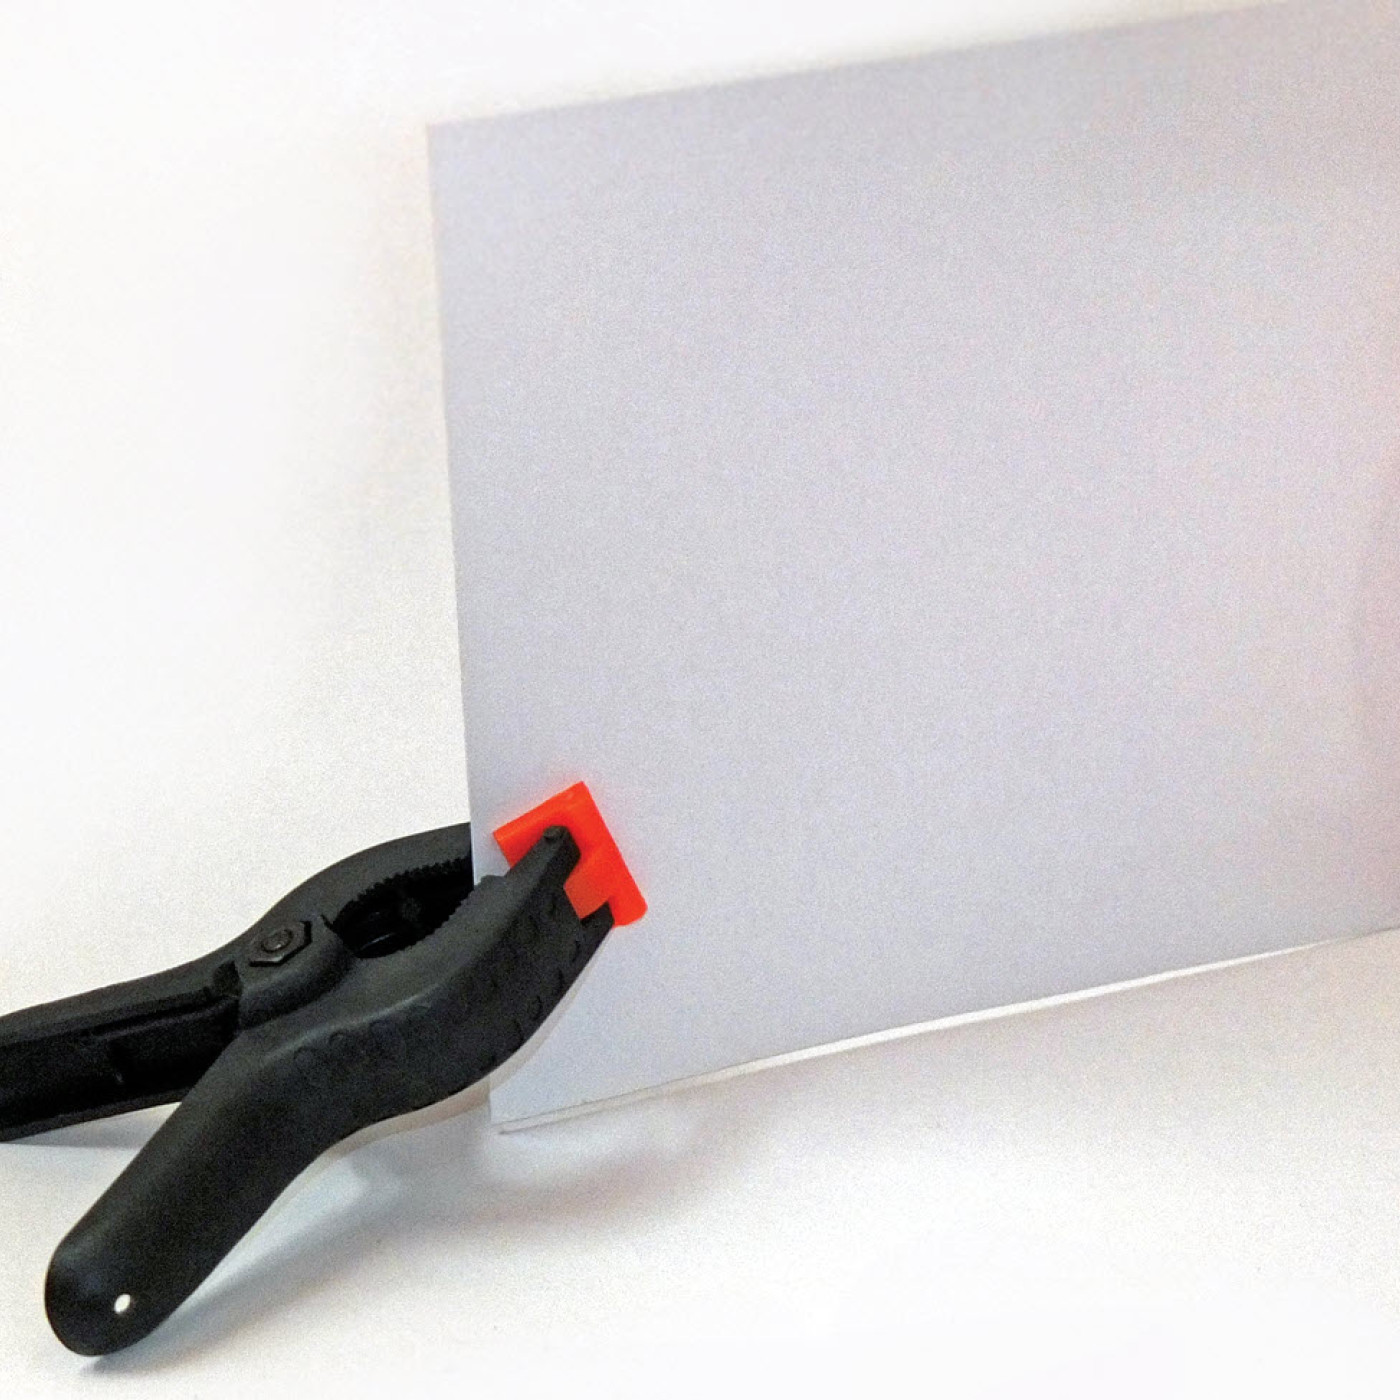
To make using bounce cards easier, I got a few large plastic workshop clamps and clipped the cardboard to the clamp so it could stand straight up.
Smartphones have flashes that produce a diffuse light that reduces the darkness of shadow areas. If you are unhappy with the built-in flash, you can darken these shadows by using a black piece of cardboard instead of white.
Angle the card to block light from being reflected on to one side of an object. Practice with your homemade bounce cards to find the best position for them, and you will quickly see a difference in your images’ contrast range.
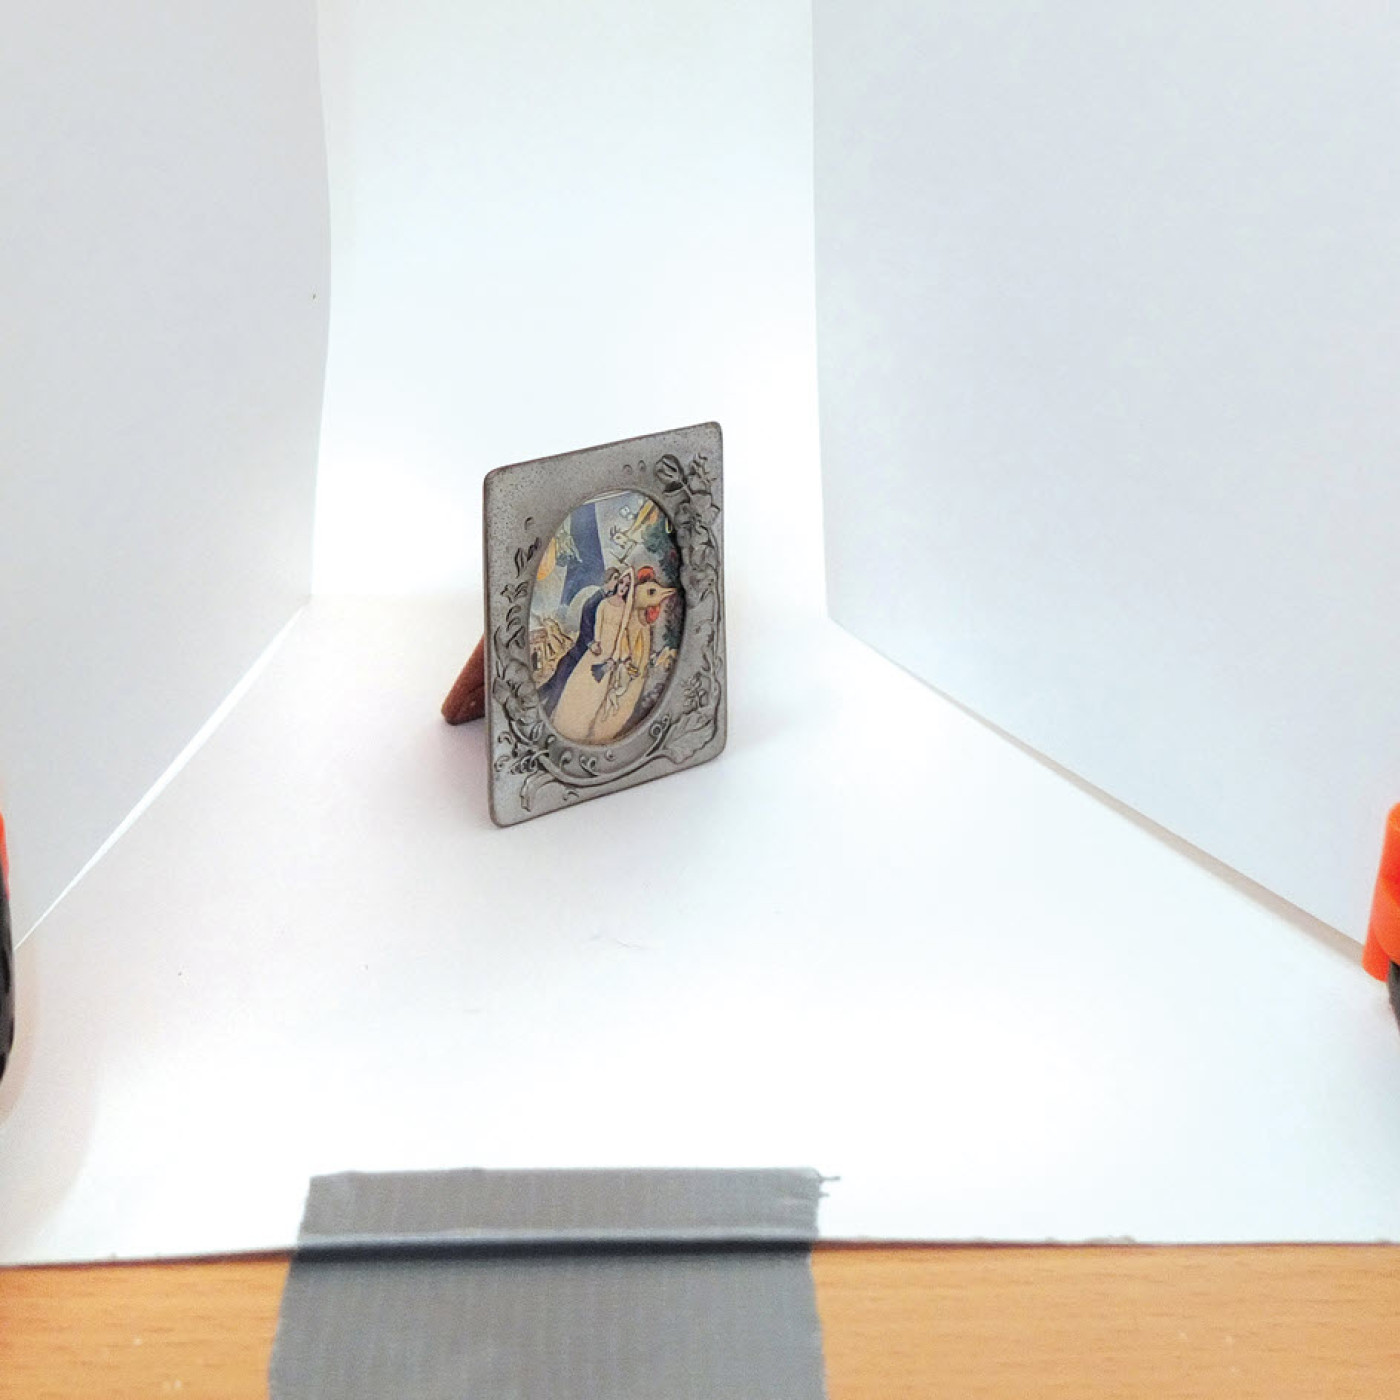
Building on the card/clamp idea, I made a little tabletop studio on my office desk. I used two clamps — each one holding a card — and had an 11 x 14-inch piece of white paper as a background.
I hung the paper from the wall, creating a graceful curve where the paper met the desk. I put a white card on either side of my subject and had a very useful small object studio for photos of jewelry or things like a tiny, handmade frame.
I took these pictures using the daylight that was coming in from a large window. I could have used my desk lamp as my light source with similar results.
This simple tabletop studio works equally well with smartphones and cameras and with bigger objects if you get larger cardboard bounce cards and background paper.
Softening the Flash
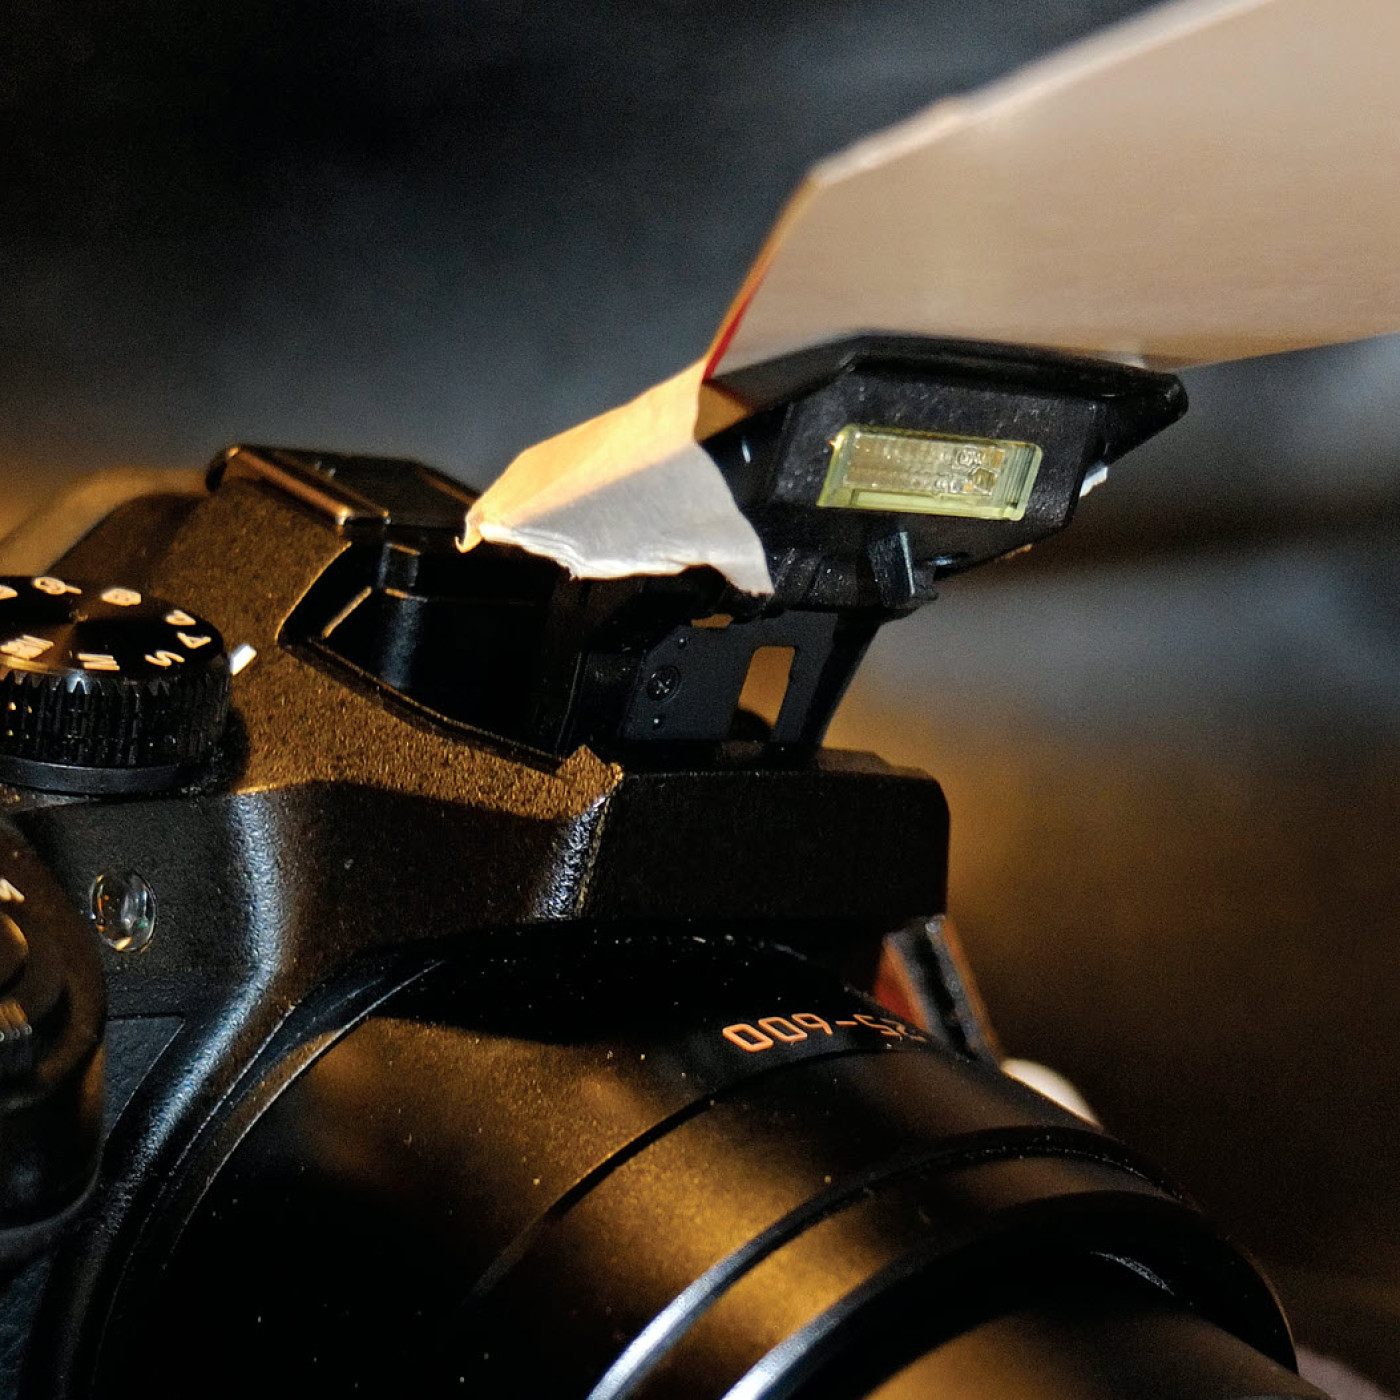
My little on-camera pop-up flash is a bit harsh and tends to produce hot spots on shiny surfaces like glazed pottery or polished jewelry. To reduce the harshness, I remembered how press photographers mount white cards on their large external camera flashes to soften the light.
These paddle-shaped cards are too big to put on a digital camera pop-up, so I started to think about how I could make one for a pop-up flash. I came up with a way to adapt the idea of bounce paddles for smaller cameras.
When it came to a pop-up flash, I was worried about its fragility. So, I decided to gently tape the card to the “legs” of the flash and the top of the camera.
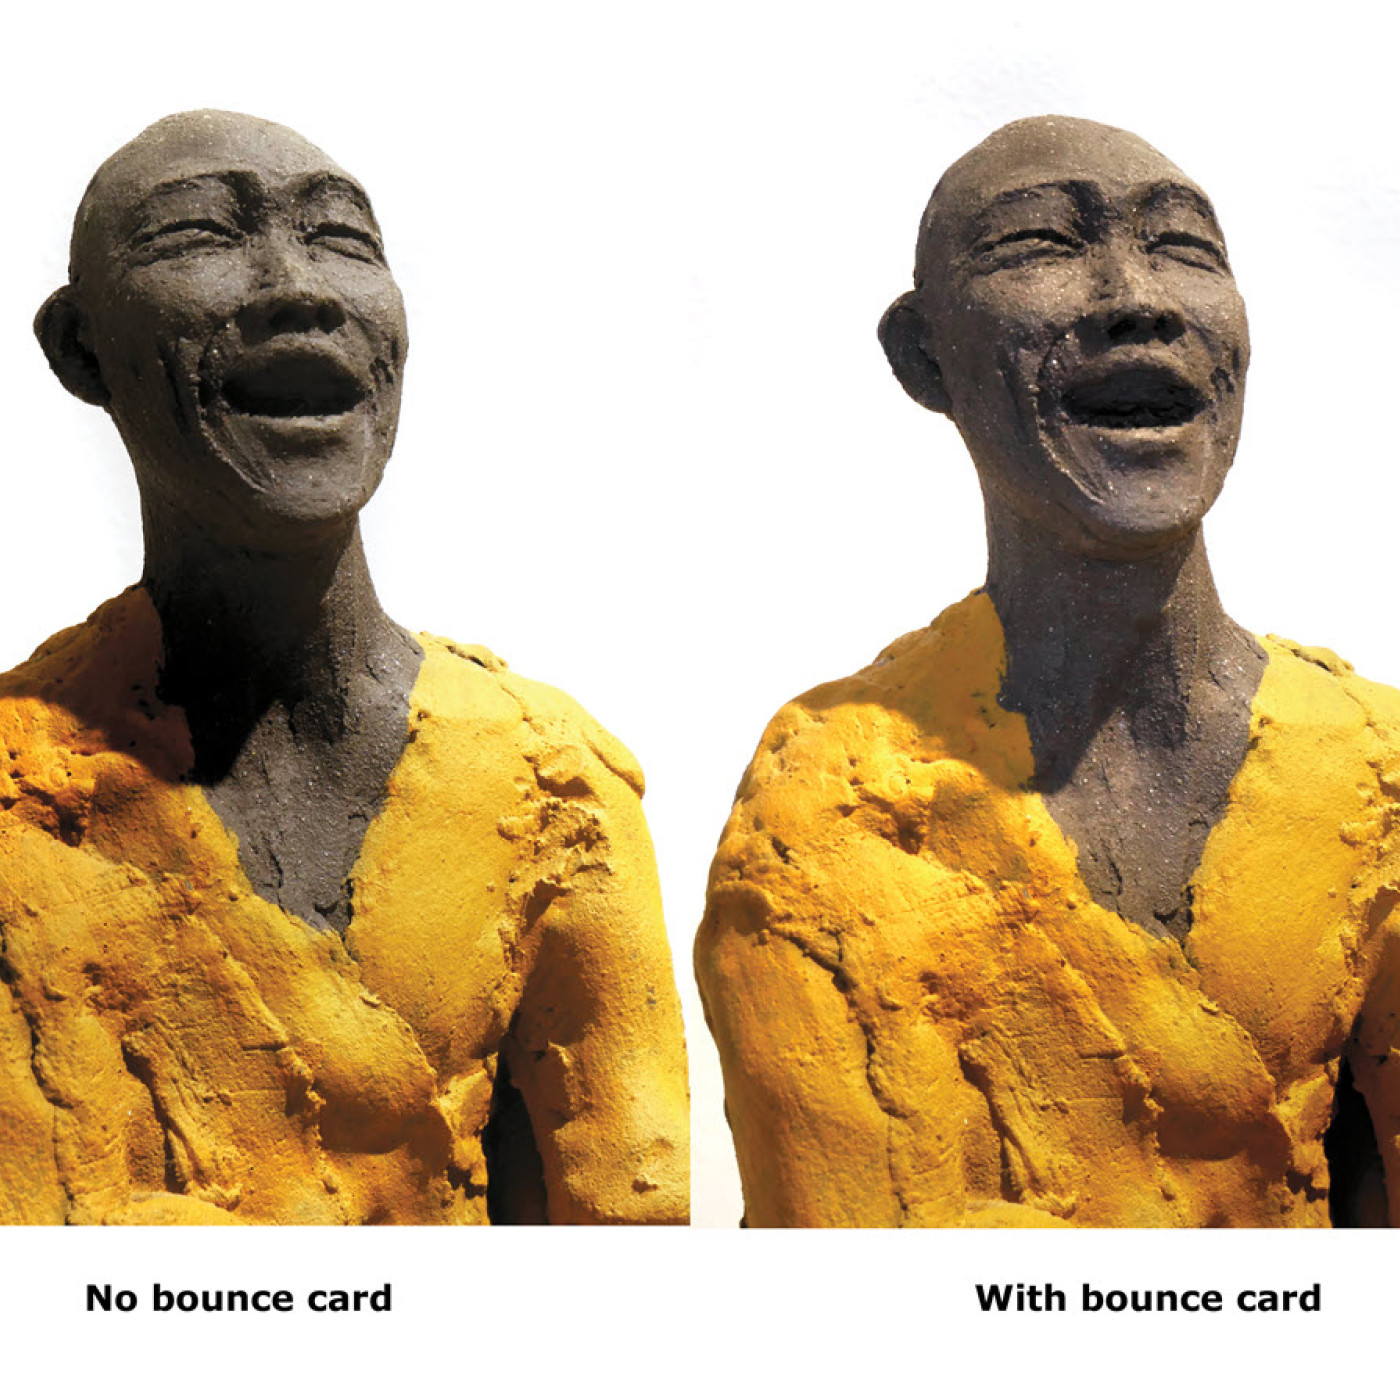
To test this homemade bounce card, I went to a local gallery and photographed a few of its pieces on display. I took photos of a 12-inch-tall sculpture by holding my camera sideways (vertically) with the flash on the left.
The first shot I took was without the card. Then taping the bounce card in place, I took a second photo. I think you can see that in that photo, the shadow areas are a little brighter.
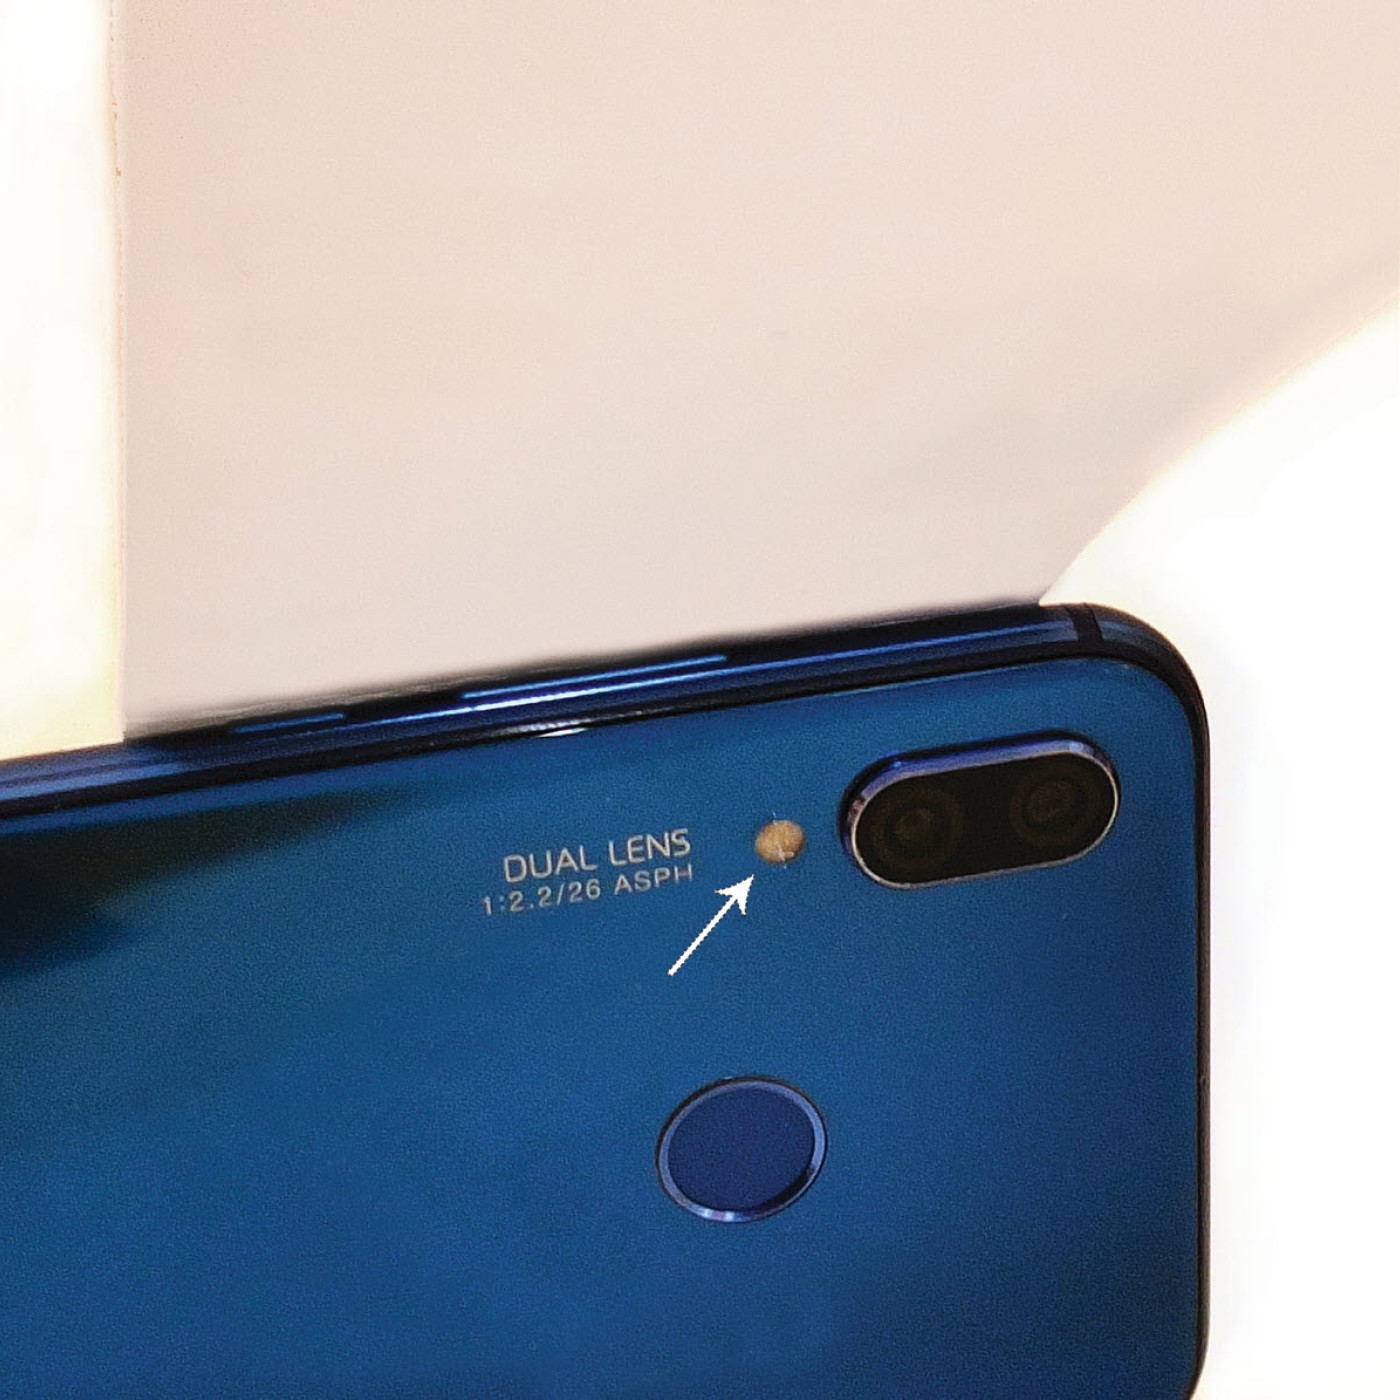
Built-in phone flashes are front light sources that produce flat, low-contrast craft images without many shadows. Most smartphones have a single diode flash. It is very small and near the lens.
When I wanted to further soften the smartphone’s flash, I made a bounce card and taped it to the screen side of the phone. That made using the smartphone tricky, but I got the even softer light I wanted.
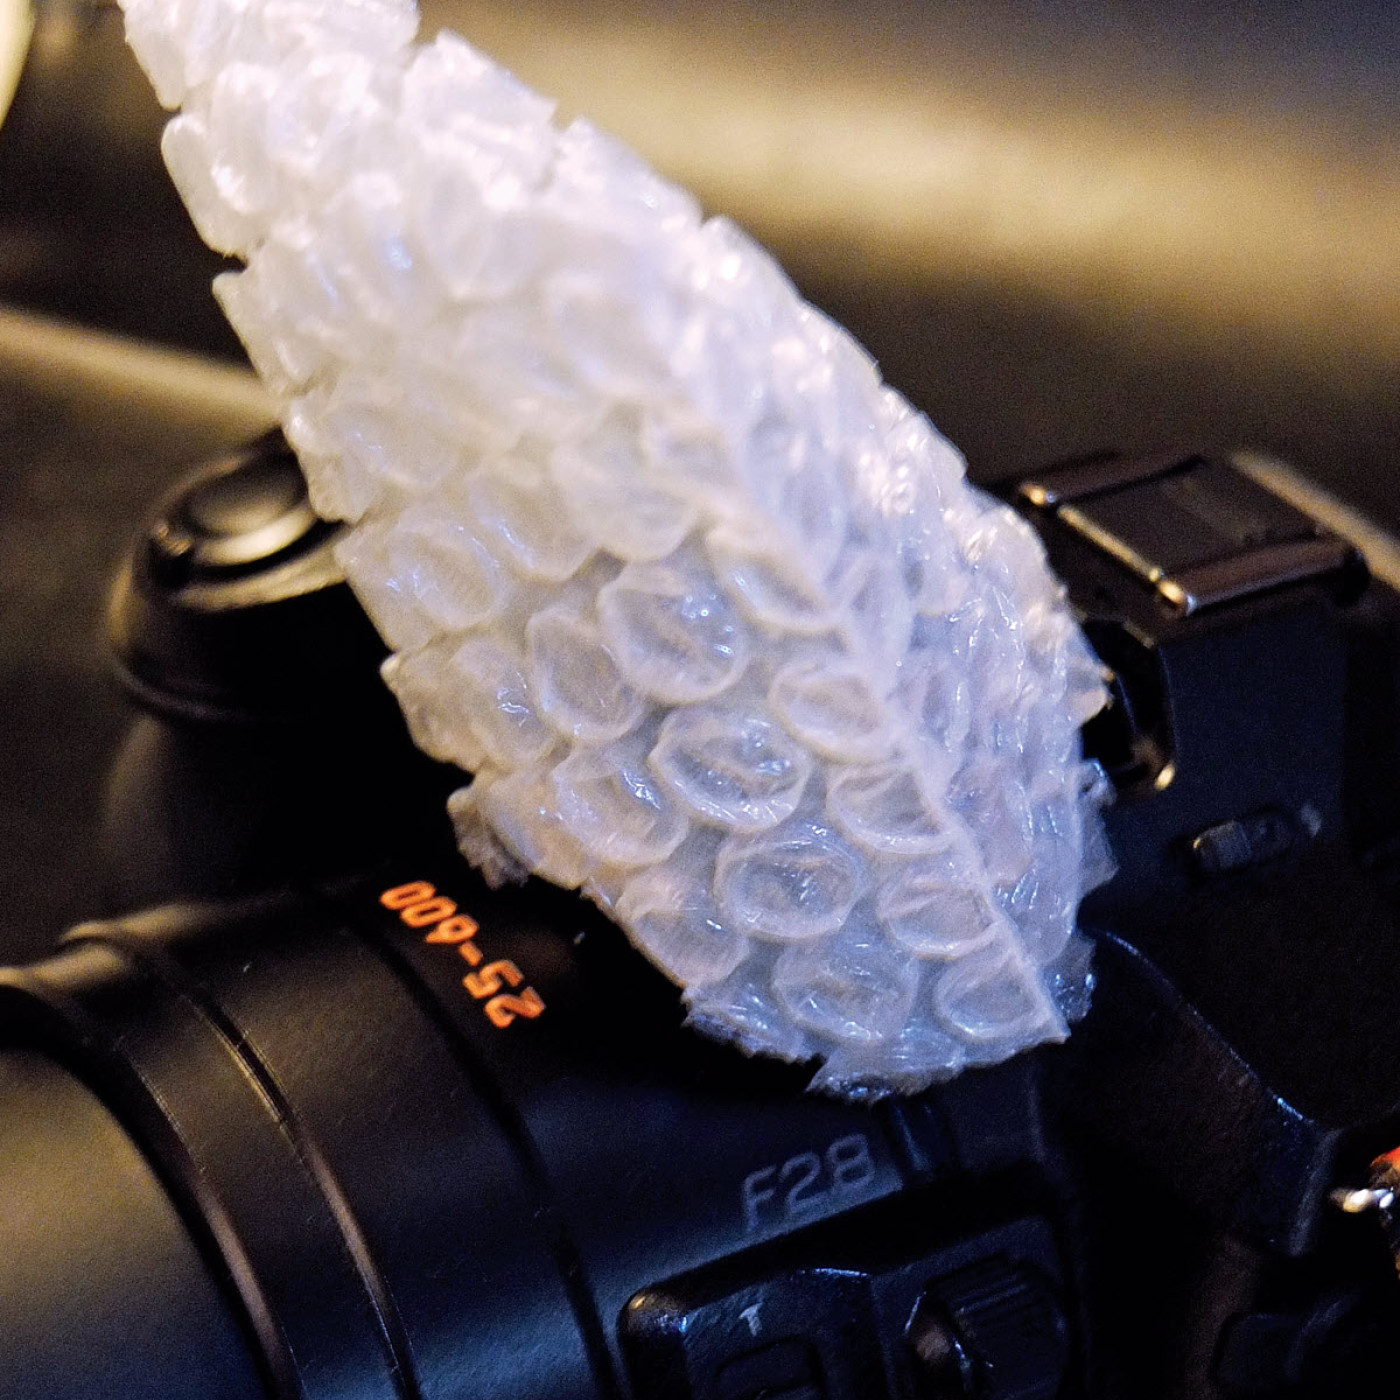
Then while writing this article, I noticed a bubble bag in one of my desk drawers. “Hmm,” I thought, “What if I tried using that bag as a diffuser over the camera flash?”
Since the bag was practically weightless, there was little chance of it doing any damage, so I put it over the camera flash and tried it. It worked quite well — lightening the shadows and even reducing glare.
There are lots of ordinary things that can be adapted for improving pictures, and it is great fun “inventing” one of these devices to improve your photos. Try it, you’ll like it.
Adjusting Contrast With the Exposure Control
To control the highlights in a scene, first check the monitor to see how badly white areas are washed out. If there are burnt out areas, one remedy is to adjust the exposure setting using the camera or phone’s exposure control.
The control is either a button on the body marked by a (-/+) icon for most cameras, or it is tucked away in the menu pages of a phone.
Find the control on your device and take a minute to get a sense of how it works. Then when highlights are too bright, try lowering the exposure by -1/2 stop or -1 stop.
In your next picture, you should see that the highlights are a little darker, and there is some texture in them.